Introduction
TradingDiary Pro uses Interactive Brokers (IB) xml statement for importing transaction history.
Interactive Brokers provides two types of xml statements. The Activity Flex and Trade Confirms Flex.
• Activity Flex statement provides daily data with all information at the end of the day (Total equity, open positions, trades, cash transactions etc.)
• Trade Confirms Flex provides the trades only but it is refreshed immediately after the trade is confirmed.
For the successful importing process you have to activate the Flex Web Service, generate a token for web service downloading and create three ID-s belonging to the xml statements described above.
Please do the following steps:
Creating Activity Flex Queries
You have to define two queries. One is for the last 30 days' data and one is for the last 365 days' data.
So please log in to the IB Account Management.
Click on the of the Reports/Flex Queries.


In the Flex Queries section click on the small plus sign, highlighted with orange.
You can see something like this:
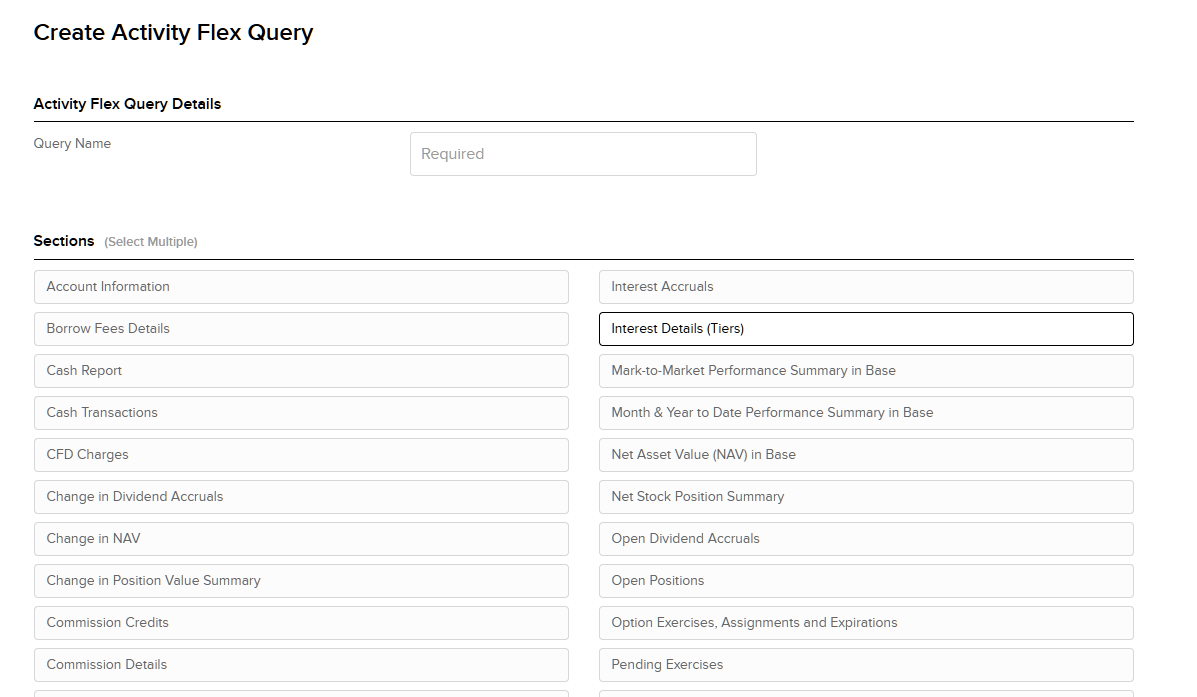
Creating 30 days Activity Flex Query
Press the create new flex query button and set the followings:
Query Name: Last30Days
Output Format: XML
Accounts: Select one or more account ID-s. Please read the multiple accounts handling section of this blog post: https://www.tradingdiarypro.com/interactive-brokers-import-issues-fixes/
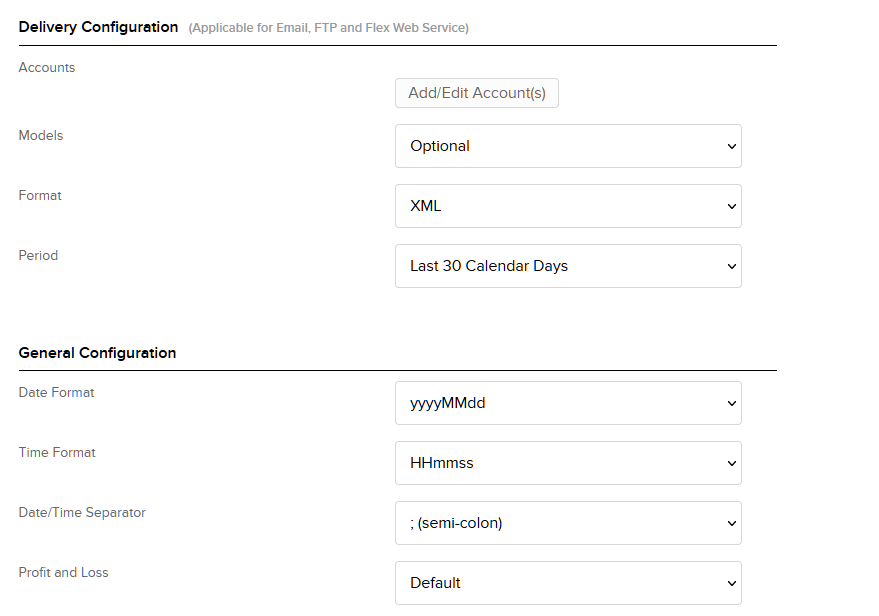
Delivery Configuration, Period Set the Last 30 Calendar Days, do not set From Date and To Date fields.
Include Canceled Trades No
Include Currency Rates Yes
It is very important to set the date format to yyyyMMdd, the time format to HHmmss and the separator to semi-colon as it is shown in the screenshot below:
Scroll up to the sections of the statement.
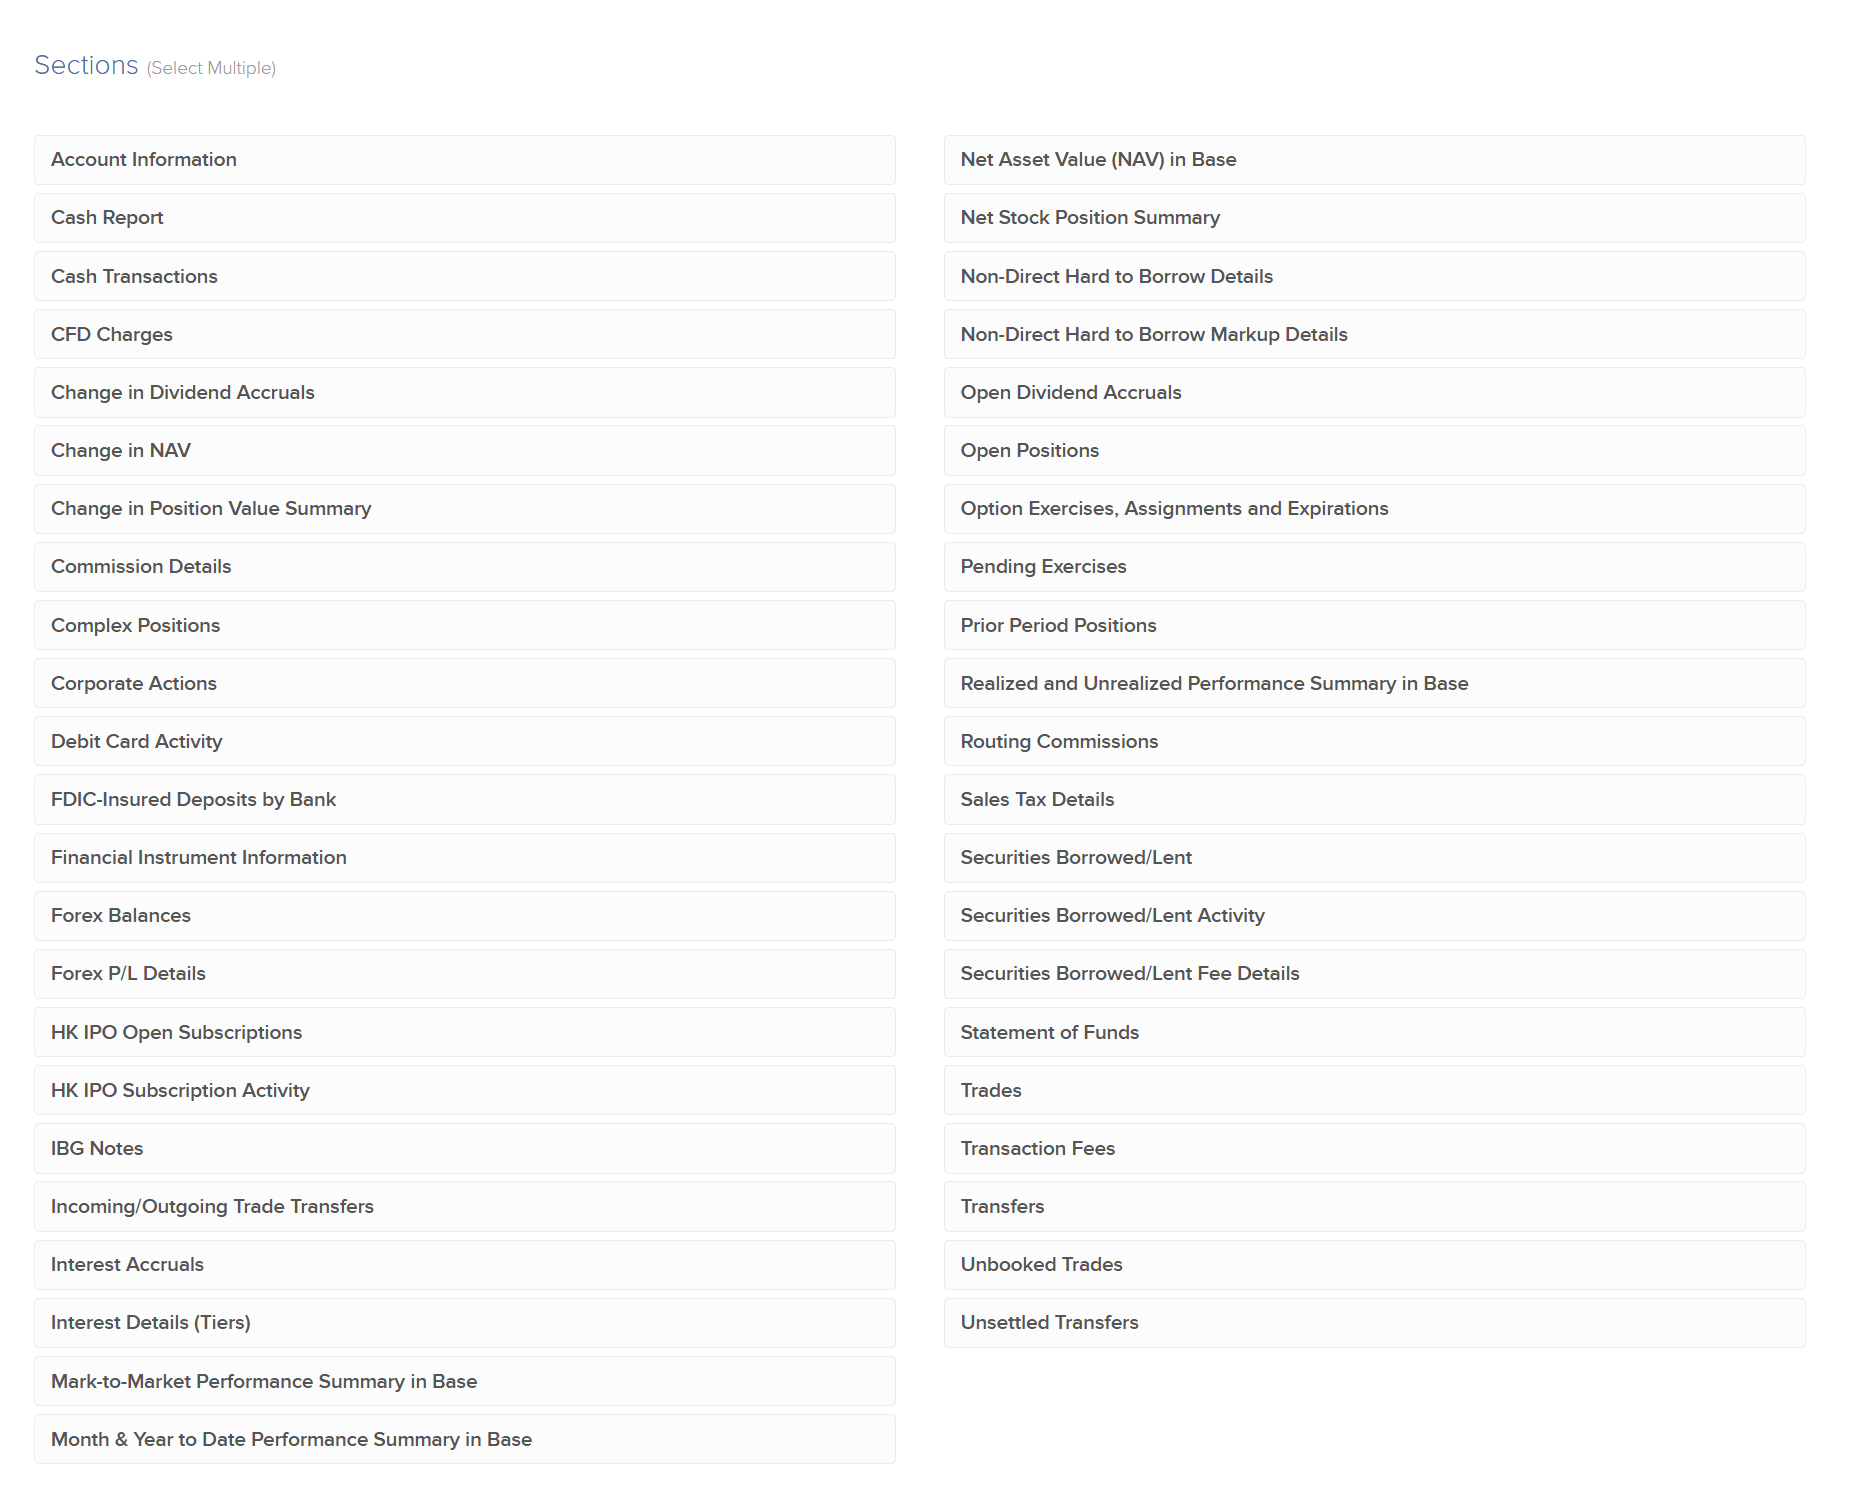
You have to add all fields of the following sections:
•Account Information
•Borrow Fee Details
•Cash Transactions
•CFD Charges
•Change in Dividend Accruals
•Corporate Actions
•Hard
•Grant Activity
•Financial Instrument Information
•Net Asset Value In Base
•Open Dividend Accruals
•Open Positions (set Level of Detail to Lot)
•Option Exercises, Assignments and Expirations
•Prior Period Positions
•Trades (tick the Executions)
•Transaction Fees
•Transfers (ACAT, Internal)
To add all fields of a section click on the Section Name for example Account Information. Click on the Select All check box. Scroll down and click on the Save button. Repeat this for all sections.
In the Account Configuration click on the Add/Edit accounts and add all account which you'd like to follow in TradingDiary Pro.
Click on the Continue button at the bottom of the page. In the review phase simply scroll down to the bottom of the page and click on the Create button.
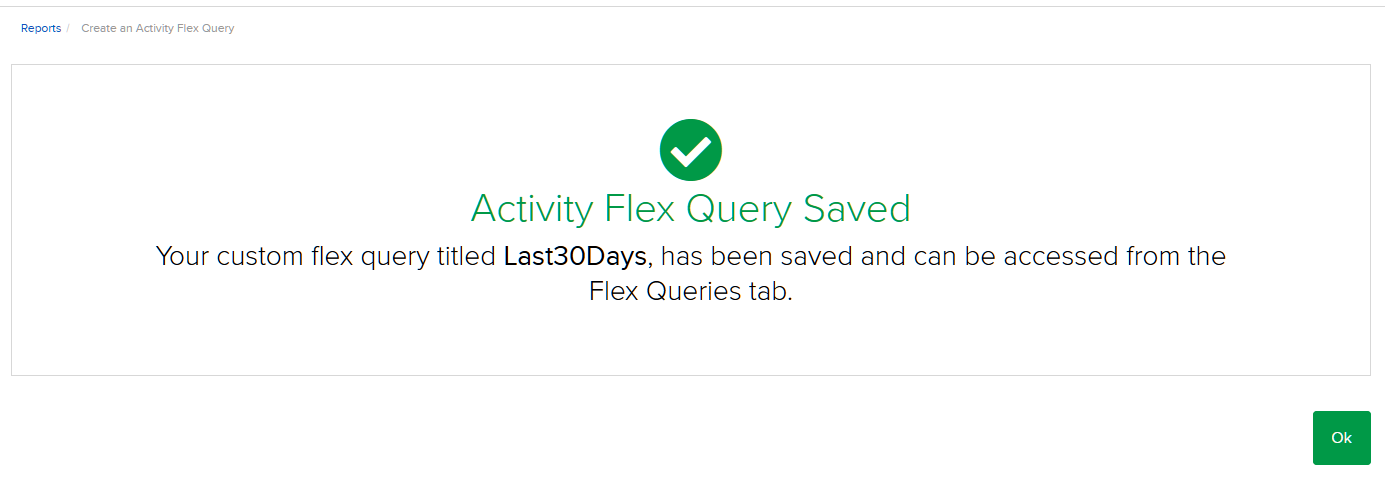
Creating 365 days Activity Flex Query.
To create another query click on the small plus sign once again.

This statement is the same as the previous one except that the date range is 365 days instead of 30 days.
Set the followings:
Query Name: Last365Days
Output Format: XML
Accounts: Select only one or more account ID-s. Please read the multiple accounts handling section of this blog post: https://www.tradingdiarypro.com/interactive-brokers-import-issues-fixes/
Date Configuration, Period Set the Last 365 Calendar Days, please do not set From Date and To Date fields.
Include Canceled Trades No
Include Currency Rates Yes
You have to add all fields of the following sections:
•Account Information
•Borrow Fee Details
•Cash Transactions
•CFD Charges
•Change in Dividend Accruals
•Corporate Actions
•Financial Instrument Information
•Grant Activity
•Net Asset Value Summary In Base
•Open Dividend Accruals
•Open Positions (set Level of Detail to Lot)
•Option Exercises, Assignments and Expirations
•Prior Period Positions
•Trades (tick the Executions)
•Transaction Fees
•Transfers (ACAT, Internal)
To add all fields of a section click on the Section Name for example Account Informations. Click on the Select All check box. Scroll down and click on the Save button. Repeat this for all sections.
In the Account Configuration click on the Add/Edit accounts and add all account which you'd like to follow in TradingDiary Pro.
Click on the Continue button at the bottom of the page. In the review phase simply scroll down to the bottom of the page and click on the Create button.
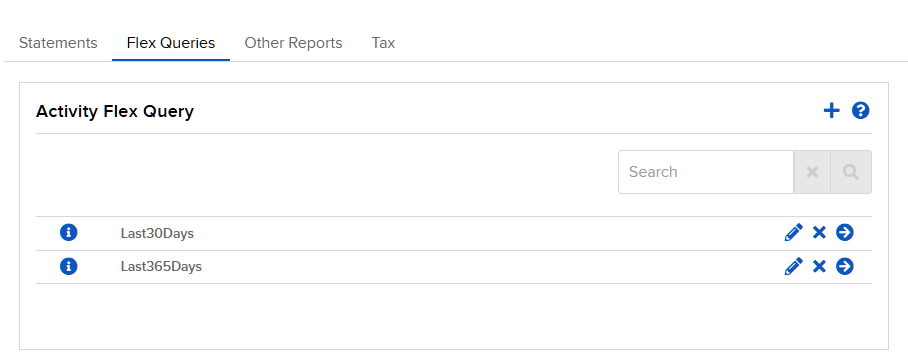
Press the Save Query button and you can see something like this:
Creating Trade Confirms Flex

Click on the small plus sign in the Trade Confirmation Flex Query section, highlighted with orange:
Creating Trade Confirms Flex.
Set the followings:
Query Name: Today
Output Format: XML
Accounts: Select only one account id. Note: multiple accounts in one database are currently not supported.
Date Configuration, Period Set Today, please do not set From Date and To Date fields.
Add all fields in the Trade Confirmations.
In the Account Configuration click on the Add/Edit accounts and add all account which you'd like to follow in TradingDiary Pro.
Click on the Continue button at the bottom of the page. In the review phase simply scroll down to the bottom of the page and click on the Create button.

All required flex queries have been created. Each flex query has its own ID and these ids are needs to be entered in TradingDiary Pro.
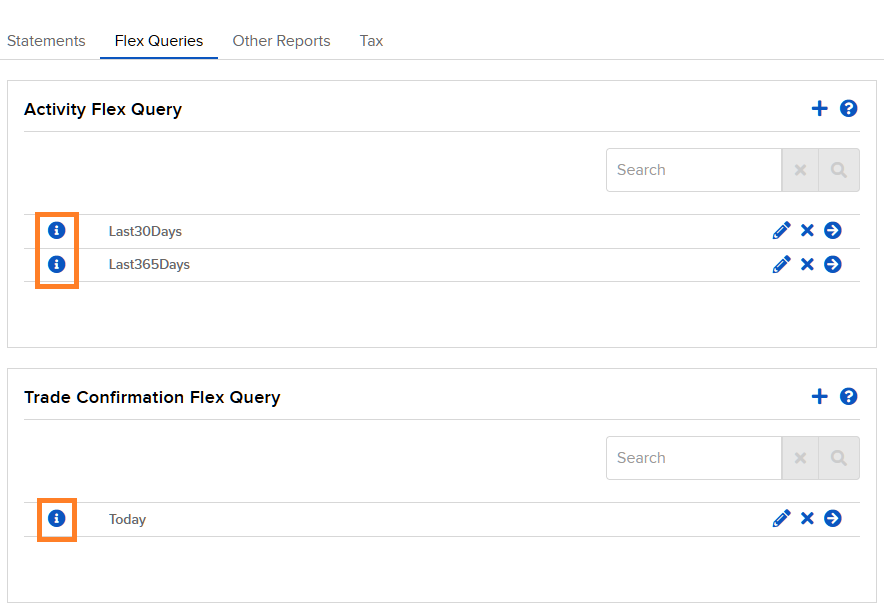
To get the query ID click on the small info button of each query. Each query has its own ID. If you click on the info button a window popped up, and it shows the query id. Write down these ID-s.

Now you have completed the Flex Query creation so you have three ID-s.
1. Activity Flex of last 30 days ID
2. Activity Flex of last 365 days ID
3. Trade Confirms Flex ID
If you want to import through the web service do not log off the IB Account Management and follow the Web Service Import chapter. If you would like to use the file import go to the File Import chapter.